
Enfin !!!
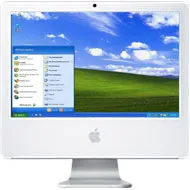
Ca y est !! Je vous en parlais il y a quelques mois et c’est maintenant possible de faire demarrer un Windows XP sur son Intel iMac ! (sans utiliser le bootloader de vista)
Des petits debrouillards ont réussi le challenge, remportant ainsi la cagnotte associée.
Ils ont en effet reussi a créer un bootloader permettant a XP de supporter l’EFI.
Si vous voulez vous lancer dans l’aventure, lisez ceci:
Installer XP sur un Mac Intel se fait en 2 étapes
1. Créer le CD d’install
2. Lancer le Cd (donc l’install).
Tout le processus est à 95% automatisé.
Ce dont vous avez besoin:
1. Un CD original d’XP Pro SP2. Il n’a pas besoin d’être bootable.
Vérifiez juste qu’il y a le repertoire i386 à la racine du CD.
2. Le fichier xom.zip.
3. Nero Burning ROM
4. Un CD vierge
5. Un PC (ah bah oui quand même !!)…
6. 20-30 minutes
Tout cela à l’air relativement simple.
Alors si je vous ai donné l’eau a la bouche, et que vous voulez vous essayer à cette manip « risquée« ,
je vous conseille de télécharger cette archive (via ed2k eMule) (ou sites mirroir: 1, 2, 3, 4, 5 )
et de BIEN LIRE le fichier howto.txt associé.
(Que je met en copie ci dessous (en anglais))
Bonne chance !!
Korben
Le site officiel http://www.winxponmac.com/
——————————————–Fichier howto.txt associé————————————–
Step-by-step Instructions
————————-
1. Unzip the xom.zip file, preserving directory structure.
(Using WinZip)
– Double click on xom.zip
– Press the Extract button
– Type « C: ». You may use another drive, but make sure to
replace references to C: with the appropriate drive letter.
– Make sure « Use Folder Names » is on
– Hit Enter
2. Copy all XP CD files into the xp/src directory.
– Insert the XP SP2 CD into the CDROM unit.
– Navigate to D: (or whatever your CDROM unit is)
– Select all files (Ctrl-A)
– Copy the files (Ctrl-C)
– Navigate to C:xpsrc
– Paste the files (Ctrl-V)
– Make sure that under the sp2 directory you have at least
an « I386 » folder.
3. Open the sp2.nrb Boot CD project inside the xp directory
– Navigate to C:xp
– Double click on the sp2.nrb file.
– Nero should launch. If not, check your Nero setup.
4. Add the XP source files to the project
– On Nero, on the right hand pane, navigate to c:xpsrc
– Select all the files on the rightmost pane (Tab, Ctrl-A)
– Copy (Ctrl-C)
– On the left hand pane, click on the CD (it says « XP_PRO_SP2 »)
– Paste (Ctrl-V)
– Make sure the I386 directory is DIRECTLY underneath the CD icon.
Like this:
* XP_PRO_SP2
+-docs
+-I386
+-SUPPORT
It SHOULD NOT LOOK LIKE THIS:
* XP_PRO_SP2
+-src
+-docs
+-I386
+-SUPPORT
If it is wrong, you can start over by selecting all the files
on the left side and pressing the DEL key.
5. Overlay the XOM files to the project
– On the right hand pane, navigate to c:xppatch
– Select all the files on the rightmost pane (Tab, Ctrl-A)
– Copy (Ctrl-C)
– On the left hand pane, click on the CD (it says « XP_PRO_SP2 »)
– Paste (Ctrl-V)
– You SHOULD get a dialog saying
« This folder already contains a folder named ‘I386′ »
« Would you like to replace the existing folder? »
« … »
[Yes] [Replace All] [No] [Cancel]
If you didn’t get this dialog, you did something wrong, if
that’s the case, close the nero project WITHOUT saving and
restart from step 3.
– Click on « Replace All »
– You should now have a $OEM$ directory next to the I386 one
in the left most pane.
6. Fix the boot.img reference in the boot tab.
– Select Compilation Properties (usually F7) from the File menu
– Go to the Boot tab
– In the image file field type EXACTLY AS IT IS:
c:xpboot.img
7. Verify your Nero version is able to burn this CD
– In the boot tab make sure it says:
– Kind of emulation: [No emulation]
– Load segment: [07C0]
– Number of sectors: [4]
– In the ISO tab make sure it says:
– Data mode: [Mode 1]
– Filesystem: [ISO9660+Joliet]
– Filename length: [Max of 31 chars (level 2)]
– Character set: [ISO9660]
[x] Allow path depth of more than 8
[x] Allow more than 255 characters in path
[x] Do not add the ‘;1’ ISO file version extension
[x] Allow more than 64 characters for Joliet names
– If any option is not present, upgrade your Nero.
8. Save the nero project. If you ever want to burn the XOM XP
again, simply reopen this project and continue from step 7.
9. Burn the CD
– Click on the Burn toolbar button.
– Make sure « Finalize CD » is turned on.
– Click on the Burn button.
You’re done. Now you have an iiMac friendly XP installation.
II. The installation
====================
The iMac needs to be repartitioned in order to do this.
This procedure requires reformatting the HD. I have not tried
partition managers but if you’re feeling adventurous you may
try one. I do not guarantee results in those cases, though.
Be forewarned: This procedure WILL WIPE YOUR iMAC DISK CLEAN.
Backup any files you don’t want to lose.
What you’ll need
—————-
1. An intel iMac (iiMac henceforth)
2. The XP CD prepared above.
Quick instructions for those knowing what they’re doing
——————————————————-
1. Partition the disk in two using the OSX CD: FAT and HFS+
2. Install OSX on the HFS+ partition.
3. Copy xom.efi (from xom.zip) into the hard disk
4. cd to the directory where you put xom.efi and type
sudo bless –folder . –file xom.efi –setBoot
5. Reboot, insert the XP CD, select windows using the arrows
and wait about 3 minutes
6. Choose the FAT partition you previously created.
(choose, not create! it should prompt for filesystem)
7. Install. Make sure to remove the CD on subsequent boots,
otherwise you’ll start the process over again.
Note: The « press any key to boot from CD » prompt doesn’t work yet
8. Done!
Step-by-step instructions
————————-
1. Boot iiMac with OSX Install CD
– Insert the OSX Installation CD
– Turn on the iiMac while pressing the C key.
– Don’t release the C key until you see the grey apple logo.
2. Run Disk Utility
– Hit Enter on the Language selection dialog
– Select from the menu: Utilities->Disk Utility
3. Create two partitions, preferably of equal size:
Partition #1 – Name: xp. Type: MS-DOS
Partition #2 – Name: osx. Type: Mac OS extended Journal
– On the left pane click on the internal hard disk (The first
entry usually). Click on the disk entry, not on any subentries
it may have.
– On the right pane click on the partition button at the top.
– From the « Volume Scheme » drop-down select « 2 partitions »
– Select the first partition on the partition map under the
Volume Scheme drop-down:
– Enter « xp » on the Name field
– Select « MS-DOS File System » from the Format drop-down.
– Select the second partition
– Enter « osx » on the Name field
– Select « Mac OS Extended (Journaled) » from the Format drop-down
– Click on the Partition button at the bottom right.
– Click « Partition » on the pop-up warning dialog.
– You should now see under the disk entry on the left two subentries:
« XP » and « osx »
– Quit the disk utility by clicking on the Red button at the dialog top left.
4. Proceed to install OSX on the newly created OS X partition.
– Click Continue on the bottom left of the install dialog.
– Click Continue again
– Click Agree on the pop-up dialog
– Select the osx partition you just created. This partition should have
a green arrow.
– Click Continue
– Click Continue
– After a while, the computer reboots
5. Let the computer reboot into OS X and launch a shell window.
– Once the computer reboots, wait for the movie to end and get through
the registration process.
– Once you get to the desktop go to « Go -> Utilities -> Terminal »
6. Copy the xom.efi bootloader to the hard disk and bless it.
– Copy the xom.efi file into your home directory.
– In the terminal type:
sudo cp xom.efi /System/Library/CoreServices <– you will have to enter
your password here
cd /System/Library/CoreServices
sudo bless –folder . –file xom.efi –setBoot
7. Insert the slipstreamed XP CD you built into the iiMac and reboot.
– To eject any disk inside press the eject key on the top left corner of
your keyboard. You can also eject any disk while rebooting by pressing
without releasing the F12 key.
– Select the Apple menu (top left) and choose « Restart »
– Click « Restart »
8. After rebooting, you should see a crystal Apple logo at the center of the
screen. Use the arrow keys (up/down) to switch between OS X and Windows.
Make sure the slipstreamed Windows XP CD is inside, select Windows and
hit Enter.
– If you forgot to insert the XP CD, you may insert it _before_
hitting Enter.
– If you left a different CD inside, do the following:
– Turn off the computer
– Turn it back on _while_pressing_ the F12 key.
– Don’t let go of the F12 key until the CD is out.
– Insert the XP CD.
– Now select Windows and hit Enter if you haven’t done so yet.
IMPORTANT NOTE: This will launch the XP setup. for about 2 minutes
and a half there will be NO FEEDBACK WHATSOEVER.
9. After about 3 minutes, you will get the partition disk screen.
Select the XP partition. This partition should read:
E: Partition1 (EFI) [FAT32] 200 MB ( 196 MB free)
C: Partition2 [Unknown] 78160 MB ( 78159 MB free)
F: Partition3 [Unknown] 77839 MB ( 77839 MB free)
Sizes may differ. The important thing is you MUST choose Partition 2.
! LEAVE THE FIRST AND THIRD PARTIONS ALONE!!!
! DO NOT REPARTITION THE DISK USING THE WINDOWS INSTALLER!!!!
10. The install prompts you for the format type to use: NTFS/FAT Quick/Slow
If the partition is too large, only the NTFS Quick/Slow options will be shown.
It is VERY IMPORTANT that you get prompted with this step. If you are
not prompted for a filesystem to install SOMETHING WENT TERRIBLY WRONG!!!
YOUR INSTALL WILL NOT WORK in that case.
11. After rebooting, do the following:
– Press F2 to disable CD booting (there’s no feedback, but you can
press F2 many times, it doesn’t hurt). Alternatively, eject the XP CD
as per step 8.
– Choose XP by using the down arrow
– Hit enter.
NOTE: This time the wait is not that long… just sit tight and wait
for about 30 secs.
12. The second phase of the XP installer starts. Complete it.
After finishing this phase, the installer seems to hang. Simply
wait enough to be sure the system is frozen and cycle power.
To do this, just keep the power button depressed for about 5 seconds.
13. Restart Windows and finish the installation. Make sure to remove
all CDs before choosing Windows.
14. Done.
———————————————————————————————————